Barra di avanzamento per le macro VBA in Excel
Bentrovato sul mio blog, io sono Marco in arte Macro Braglia e, se non mi conosci, sono un esperto di Excel e di automazione con le macro.
Quante volte ti sei chiesto a che punto è la macro che sta lavorando per te e sta “tenendo in ostaggio” il tuo Excel???
Dare un riscontro visivo dell’avanzamento di una procedura è un punto molto importante della User Experience nell’utilizzo di qualsiasi software….e le nostre macro VBA non possono certo essere da meno!
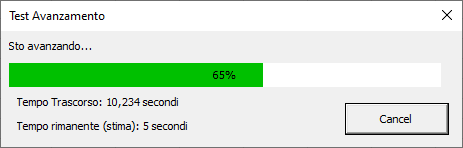
Con la barra di avanzamento (aka: Progress Bar) che imparerai a costruire in questo articolo potrai aggiungere un tocco di professionalità ai tuoi file Excel automatizzati:
Ho creato questa barra di avanzamento più di dieci anni fa, quando per la prima volta ne ho avuto bisogno sul lavoro, prendendo spunto da un esempio in inglese trovato sul web che purtroppo non riesco a ritrovare per poterlo linkare e attribuirgli i giusti meriti. Da allora, l’ho conservata con cura e usata in tantissimi progetti professionali e personali.
Gli step necessari per costruire la barra di avanzamento in Excel vba sono i seguenti:
- Creare la UserForm e aggiustarla graficamente secondo i propri gusti
- Inserire il codice VBA della UserForm per fare la configurazione iniziale della barra di avanzamento e aggiornarne lo stato mentre la macro procede
- Invocare la barra di avanzamento e aggiornarla
TL;DR
Puoi scaricare il file completo con la progress bar e un esempio di utilizzo direttamente qui.
Creare la UserForm
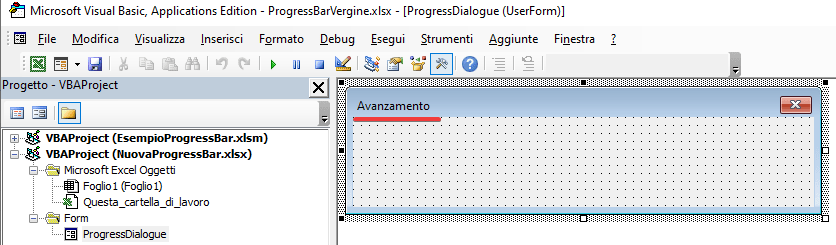
Nel menu Sviluppo del nostro Excel, clicca su Inserisci -> UserForm:

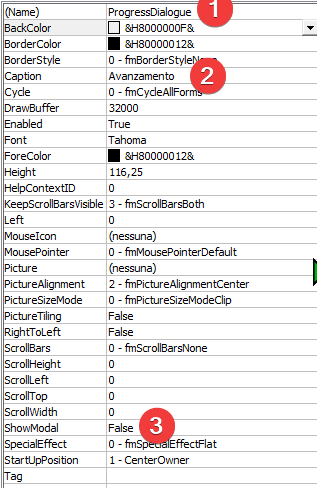
Ridimensiona a piacere la UserForm, rinominala e cambia il titolo (Caption) e, importantissimo, cambia la proprietà ShowModal in False:
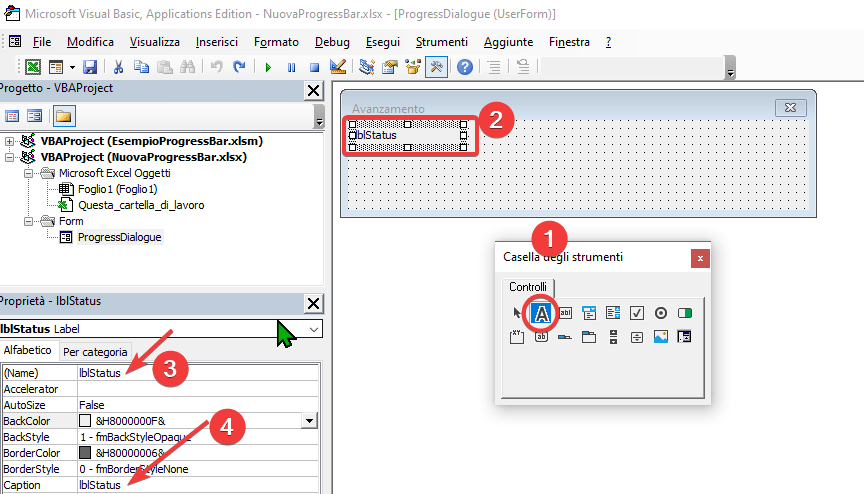
Aggiungi un’etichetta e rinominala lblStatus:
Aggiungi un’etichetta e rinominala ProgressBarBG, rappresenterà lo sfondo della nostra barra di avanzamento. Cambia la proprietà BackColor con un colore a scelta (in questo caso bianco), elimina la caption e annotati il valore della proprietà Width:

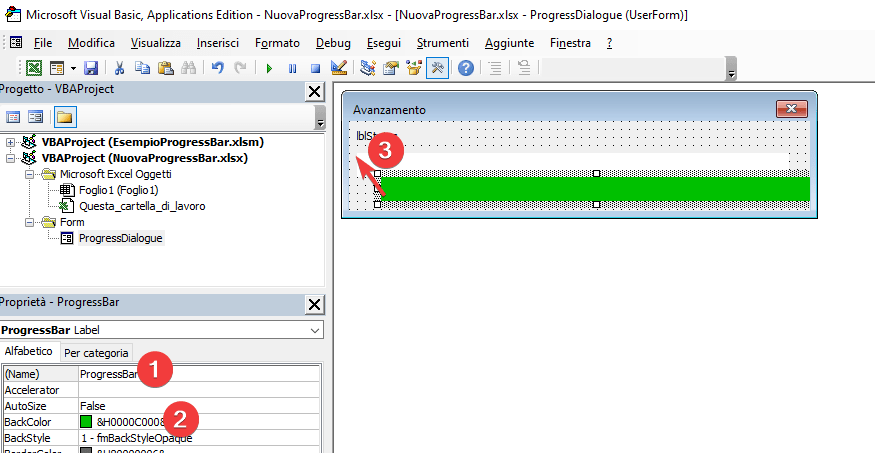
Copia l’etichetta bianca appena creata, incollala sotto, cambia il nome in ProgressBar, cambia il colore con uno a piacere (in questo caso verde) e spostala esattamente sovrapposta a quella bianca creata in precedenza.

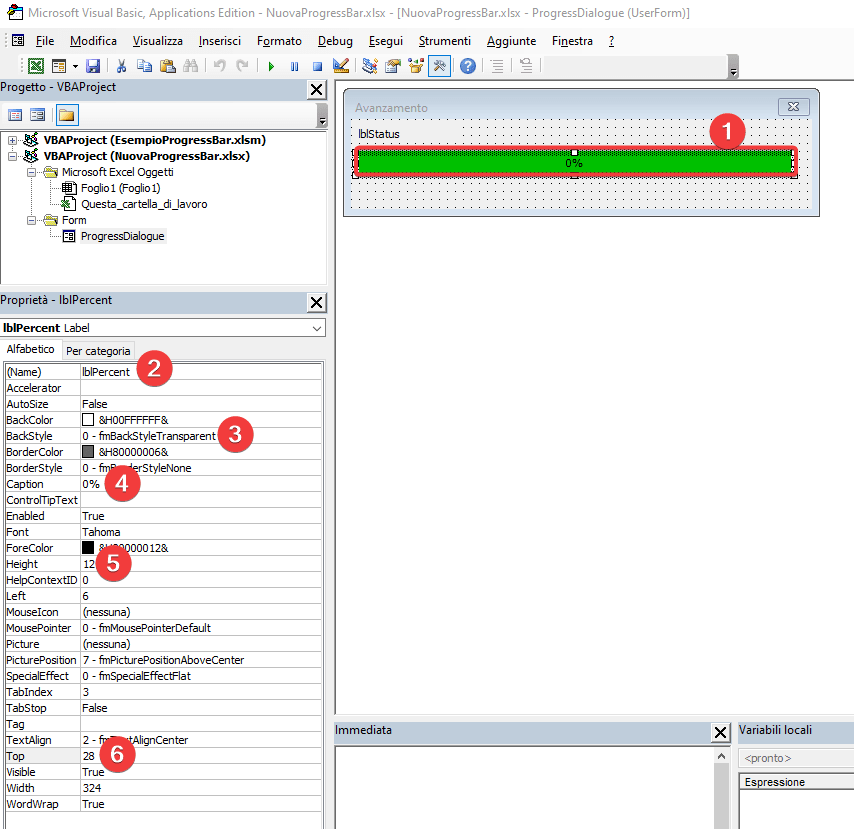
Copia l’etichetta appena creata e incollala sotto. Cambia il nome in lblPercent. Imposta la proprietà BackStyle al valore “0 - fmBackStyleTransparent”. Cambia la caption scrivendo “0%”. Aggiusta le proprietà Height e Top in modo che il testo appaia centrato verticalmente all’interno della barra verde.
Aggiungi un’etichetta sotto la barra e cambia Name e Caption in lblRunTime:
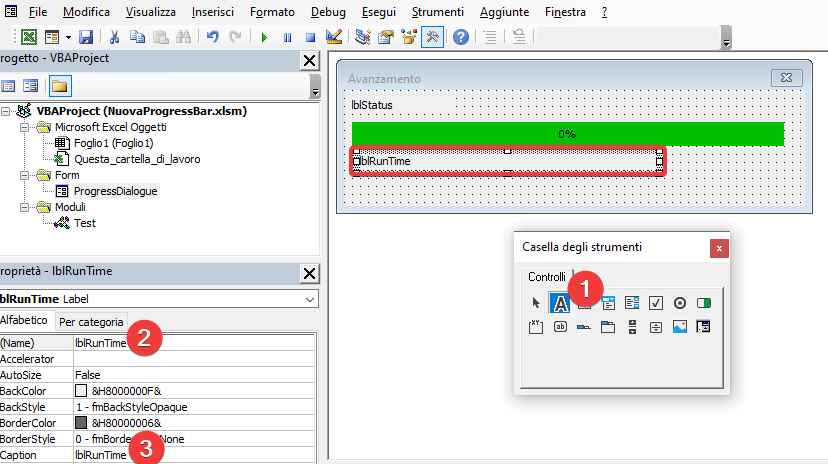
Ripeti per l’ultima etichetta con Name e Title lblRemainingTime:

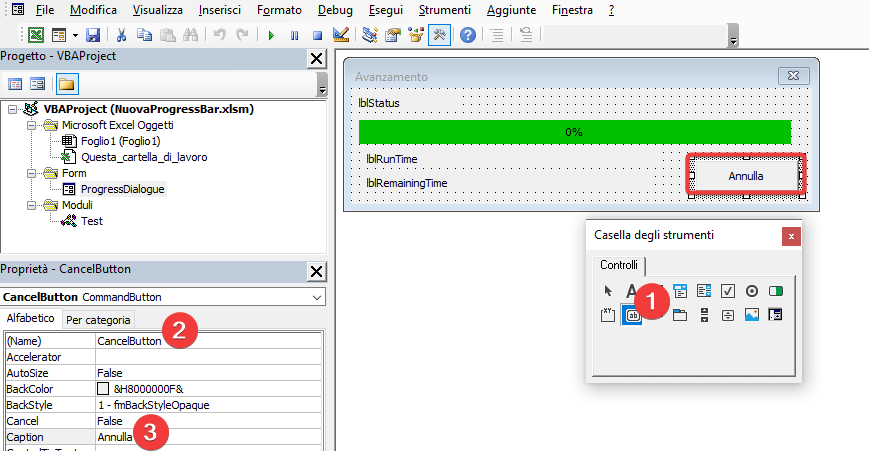
Aggiungi un pulsante e cambia il Name in CancelButton e la Caption in Annulla:
Inserire il codice nella UserForm
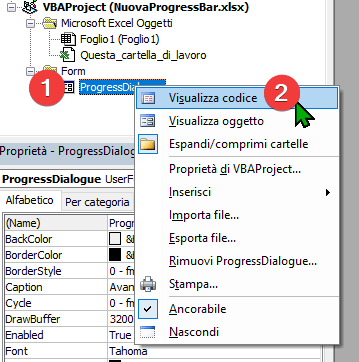
Fai clic destro sul nome della UserForm e seleziona Visualizza Codice:
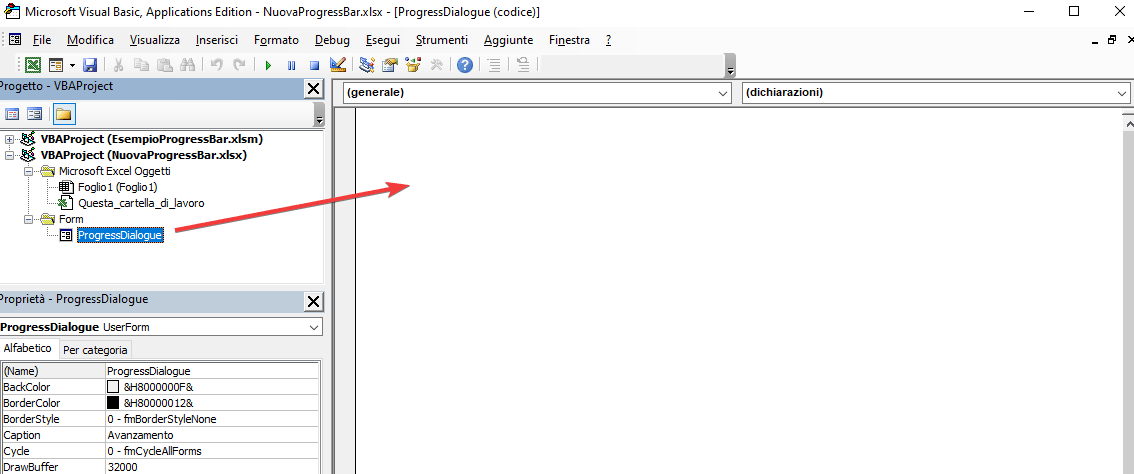
Nella finestra che si apre incolla il seguente codice:
Option Explicit

Dim Cancelled As Boolean, showTime As Boolean, showTimeLeft As Boolean
Dim startTime As Long
Dim BarMin As Long, BarMax As Long, BarVal As Long

Private Declare PtrSafe Function GetTickCount Lib "Kernel32" () As Long

'Title will be the title of the dialogue.
'Status will be the label above the progress bar, and can be changed with SetStatus.
'Min is the progress bar minimum value, only set by calling configure.
'Max is the progress bar maximum value, only set by calling configure.
'CancelButtonText is the caption of the cancel button. If set to vbNullString, it is hidden.
'optShowTimeElapsed controls whether the progress bar computes and displays the time elapsed.
'optShowTimeRemaining controls whether the progress bar estimates and displays the time remaining.
'calling Configure sets the current value equal to Min.
'calling Configure resets the current run time.
Public Sub Configure(ByVal title As String, ByVal status As String, _
                     ByVal Min As Long, ByVal Max As Long, _
                     Optional ByVal CancelButtonText As String = "Cancel", _
                     Optional ByVal optShowTimeElapsed As Boolean = True, _
                     Optional ByVal optShowTimeRemaining As Boolean = True)
    Me.Caption = title
    lblStatus.Caption = status
    BarMin = Min
    BarMax = Max
    BarVal = Min
    CancelButton.Visible = Not CancelButtonText = vbNullString
    CancelButton.Caption = CancelButtonText
    startTime = GetTickCount
    showTime = optShowTimeElapsed
    showTimeLeft = optShowTimeRemaining
    lblRunTime.Caption = ""
    lblRemainingTime.Caption = ""
    Cancelled = False
End Sub

'Set the label text above the status bar
Public Sub SetStatus(ByVal status As String)
    lblStatus.Caption = status
    DoEvents
End Sub

'Set the value of the status bar, a long which is snapped to a value between Min and Max
Public Sub SetValue(ByVal value As Long)
    If value < BarMin Then value = BarMin
    If value > BarMax Then value = BarMax
    Dim progress As Double, runTime As Long
    BarVal = value
    progress = (BarVal - BarMin) / (BarMax - BarMin)
    ProgressBar.Width = 292 * progress
    lblPercent = Int(progress * 100) & "%"
    runTime = GetRunTime()
    If showTime Then lblRunTime.Caption = "Tempo Trascorso: " & GetRunTimeString(runTime, True)
    If showTimeLeft And progress > 0 Then _
        lblRemainingTime.Caption = "Tempo rimanente (stima): " & GetRunTimeString(runTime * (1 - progress) / progress, False)
    DoEvents
End Sub

'Get the time (in milliseconds) since the progress bar "Configure" routine was last called
Public Function GetRunTime() As Long
    GetRunTime = GetTickCount - startTime
End Function

'Get the time (in hours, minutes, seconds) since "Configure" was last called
Public Function GetFormattedRunTime() As String
    GetFormattedRunTime = GetRunTimeString(GetTickCount - startTime)
End Function

'Formats a time in milliseconds as hours, minutes, seconds.milliseconds
'Milliseconds are excluded if showMsecs is set to false
Private Function GetRunTimeString(ByVal runTime As Long, Optional ByVal showMsecs As Boolean = True) As String
    Dim msecs&, hrs&, mins&, secs#
    msecs = runTime
    hrs = Int(msecs / 3600000)
    mins = Int(msecs / 60000) - 60 * hrs
    secs = msecs / 1000 - 60 * (mins + 60 * hrs)
    GetRunTimeString = IIf(hrs > 0, hrs & " ore ", "") _
                     & IIf(mins > 0, mins & " minuti ", "") _
                     & IIf(secs > 0, IIf(showMsecs, secs, Int(secs + 0.5)) & " secondi", "")
End Function

'Returns the current value of the progress bar
Public Function GetValue() As Long
    GetValue = BarVal
End Function

'Returns whether or not the cancel button has been pressed.
'The ProgressDialogue must be polled regularily to detect whether cancel was pressed.
Public Function cancelIsPressed() As Boolean
    cancelIsPressed = Cancelled
End Function

'Recalls that cancel was pressed so that they calling routine can be notified next time it asks.
Private Sub CancelButton_Click()
    Cancelled = True
    lblStatus.Caption = "Cancelled By User. Please Wait."
End Sub

Private Sub UserForm_QueryClose(Cancel As Integer, CloseMode As Integer)
    Cancelled = True
    lblStatus.Caption = "Cancelled By User. Please Wait."
End Sub
Nella funzione SetValue, cambia il numero con la Width impostata per le etichette ProgressBarBG e ProgressBar nei punti precedenti. Questo ti servirà per fare in modo che la barra di avanzamento si estenda con le proporzioni giuste sulle label effettive che hai inserito in precedenza nella UserForm.

Invocare la barra di avanzamento e utilizzarla
Per poter utilizzare la barra di avanzamento in Excel appena creata, è necessario invocarla all’interno della tua propria macro VBA. In questo esempio andremo ad utilizzare un codice che non fa nulla di pratico ma mostra la barra di avanzamento in un ciclo for da -10.000 a +10.000.
I passaggi per utilizzare la barra di avanzamento sono:
- Inizializzare un nuovo ProgressDialogue
- Fare la configurazione iniziale impostando Title, Status, Min e Max
- Mostrare il ProgressDialogue
- Per ogni iterazione della tua macro, aggiornare il Value e lo Status del ProgressDialogue in modo che la barra possa “avanzare”
- Nascondere il ProgressDialogue al termine della macro
Clicca su Inserisci->Modulo
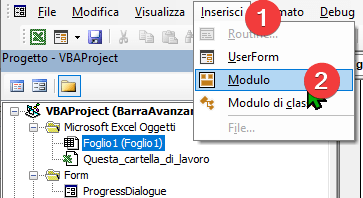
Aggiungi un modulo, cambia il nome in Test e al suo interno incolla il seguente codice:
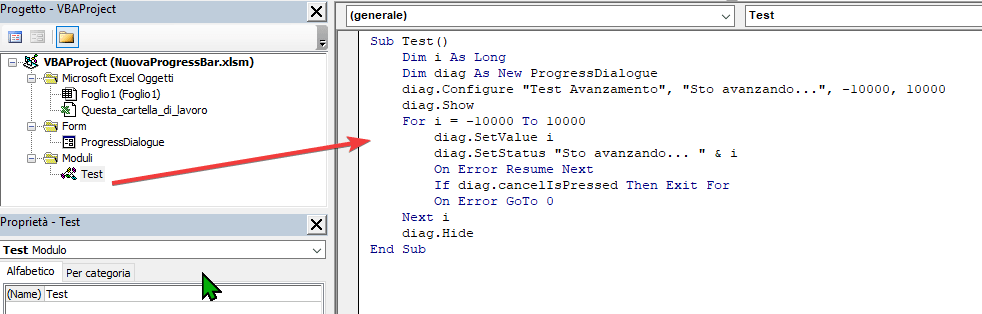
Sub Test()
Dim i As Long
Dim diag As New ProgressDialogue
diag.Configure "Test Avanzamento", "Sto avanzando...", -10000, 10000
diag.Show
For i = -10000 To 10000
diag.SetValue i
diag.SetStatus "Sto avanzando... " & i
On Error Resume Next
If diag.cancelIsPressed Then Exit For
On Error GoTo 0
Next i
diag.Hide
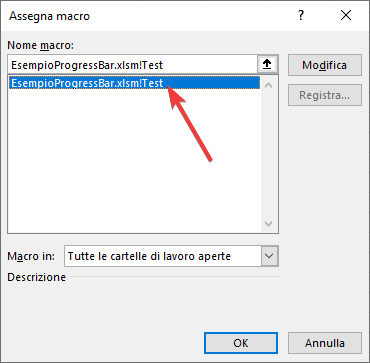
End SubNel foglio Excel (fuori quindi dall’editor VBA) clicca su Sviluppo->Inserisci->Controlli Modulo – Pulsante:

Disegna la forma sul foglio e, nel finestra pop up che si apre, seleziona la macro Test creata in precedenza:
Fai clic destro sul pulsante -> Modifica Testo per modificare il testo visualizzato dentro al pulsante:
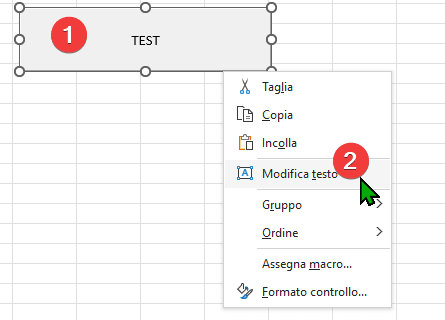
E ora non ti resta che cliccare sul pulsante di TEST e goderti la tua nuova barra di avanzamento in Excel:
#ExcelHaSempreRagione